A Stata command to run ChatGPT
Artificial intelligence (AI) is a popular topic in the media these days, and ChatGPT is, perhaps, the most well-known AI tool. I recently tweeted that I had written a Stata command called chatgpt for myself that runs ChatGPT. I promised to explain how I did it, so here is the explanation.
Review of Stata/Python integration
My chatgpt command uses a combination of Stata and Python code. You may want to read my previous blog posts if you are not familiar with using Stata and Python together.
- Stata/Python integration part 1: Setting up Stata to use Python
- Stata/Python integration part 2: Three ways to use Python in Stata
- Stata/Python integration part 3: How to install Python packages
- Stata/Python integration part 4: How to use Python packages
- Stata/Python integration part 6: Working with APIs and JSON data
- Stata/Python integration part 8: Using the Stata Function Interface to copy data from Stata to Python

Using Python to interact with ChatGPT
ChatGPT was created by OpenAI, and we will be using the OpenAI API to communicate with ChatGPT. You will need an Open AI user account and your own Open AI API key to use the code below. You will also need to install the Python package openai. You can type shell pip install openai in the Stata command window if you are using Python. You may need to use a different method to install the openai package if you are using Python as part of a platform such as Anaconda.
Let’s begin by writing some Python code to import the openai package, define a function named chatgpt(), and pass our API key to the Open AI server. I have typed comments using a green font to indicate the purpose of each subsequent line of code. Note that the function is defined using tabs. The function definition begins with def chatgpt() and ends when the section of tabbed code ends.
python:

# Import the Open AI package

import openai

# Define a function named chatgpt()

def chatgpt():

     # Pass my API key to the OpenAI server

     openai.api_key = "PASTE YOUR API KEY HERE"

end
Next, let’s add some code to ask ChatGPT to write a haiku about Stata. We will store our query to inputtext. Then we will send the query through the API to ChatGPT using the ChatCompletion.create() method and store ChatGPT’s reply to outputtext. The term “method” is Python jargon for a function, and the ChatCompletion.create() method requires two arguments. The model argument specifies that we will use the “gpt-3.5-turbo” model, and the messages argument specifies that we are submitting our query in our role as a “user” and the content of our query is stored in inputtext. The text of ChatGPT’s reply is stored in outputtext.choices[0].message.content, and the last line of code in our chatgpt() function prints the reply to the screen.
python:

# Import the Open AI package

import openai

# Define a function named chatgpt()

def chatgpt():

     # Pass my API key to the OpenAI server

     openai.api_key = "PASTE YOUR API KEY HERE"

     # Define an input string

     inputtext = "Write a haiku about Stata"

     # Send the inputtext through the API to ChatGPT

     # and store the result to outputtext

     outputtext = openai.ChatCompletion.create(

          model="gpt-3.5-turbo",

          messages=[{"role": "user", "content": inputtext}]

     )

     # Display the result

     print(outputtext.choices[0].message.content)

end
Now we can run our function in Python and view the result.
. python:
------------------------------ python (type end to exit) -----------------------
>>> chatgpt()
Data ready, Stata
Regression, plots, and graphs
Insights we unearth
>>> end
--------------------------------------------------------------------------------
It worked! And this was much easier than I would have guessed when we began. Keep in mind that we are just using ChatGPT for fun. You should understand the copyright implications and double-check the content before using ChatGPT for serious work.
Calling the Python function from Stata
The easiest way to use our new Python function with Stata is to simply type python: chatgpt(). Note that ChatGPT returns a different reply each time we use our function.
. python: chatgpt()
Data is sacred
Stata, the guiding compass
Insights, clear and true
But I would like to create a Stata command to run my chatgpt() function in Python. I can create a Stata command named chatgpt by typing program chatgpt to begin my command and typing end to end the command.
program chatgpt

     python: chatgpt()

end
For technical reasons, our new chatgpt command won’t work yet. We can make it work by saving our Stata code and Python code in a file named chatgpt.ado. Note that I’ve made two changes to our code in the code block below. First, I removed the comments to save space. And second, we have already defined the Python function chatgpt() and the Stata program chatgpt. So I have typed python clear and program drop chatgpt to remove them from Stata’s memory.
chatgpt.ado version 1
python clear

program drop chatgpt

program chatgpt

     version 18

     python: chatgpt()

end


python:

import openai

def chatgpt():

     openai.api_key = "PASTE YOUR API KEY HERE"

     inputtext = "Write a haiku about Stata"

     outputtext = openai.ChatCompletion.create(

          model="gpt-3.5-turbo",

          messages=[{"role": "user", "content": inputtext}]

     )

     print(outputtext.choices[0].message.content)

end
Let’s run our code to redefine our Stata command chatgpt and our Python function chatgpt() and then type chatgpt.
. chatgpt
Statistical tool
Stata, analyzing data
Insights brought to light
It worked! We successfully wrote a Stata command that calls a Python function that sends our query through the OpenAI API to ChatGPT, retrieved the reply from ChatGPT through the API, and printed the reply to the screen.
Passing queries from Stata to Python
That was fun, but, sooner or later, we may grow tired of reading haikus about Stata and wish to submit a new query to ChatGPT. It would be nice if we could type our query directly into our Stata command. To do this, we will need to allow our Stata command to accept an input string and then pass that string to our Python function.
We can allow our chatgpt command to accept a string input by adding the line args InputText. Then we can type chatgpt “query”, and the contents of query will be stored in the local macro InputText. I have added this line to the code block below using a red font.
Next, we will need to pass the local macro InputText from Stata to our Python function. Stata’s Function Interface (SFI) makes it easy to pass information back-and-forth between Stata and Python. First we can type from sfi import Macro to import the Macro package from SFI. Then we can type inputtext = Macro.getLocal(‘InputText’) to use the getLocal() method to pass the Stata local macro InputText to the Python variable inputtext. I have again added these lines of code with a red font in the code block below so they are easy to see.
chatgpt.ado version 2
python clear

capture program drop chatgpt

program chatgpt

     version 18

     args InputText

     python: chatgpt()

end


python:

import openai

from sfi import Macro

def chatgpt():

     openai.api_key = "PASTE YOUR API KEY HERE"

     inputtext = Macro.getLocal('InputText')

     outputtext = openai.ChatCompletion.create(

          model="gpt-3.5-turbo",

          messages=[{"role": "user", "content": inputtext}]

     )

     print(outputtext.choices[0].message.content)

end
Let’s run our updated code to redefine our Stata command chatgpt and our Python function chatgpt() and then try the new version of our chatgpt command.
. chatgpt "Write a limerick about Stata"
There once was a software named Stata,
For data analysis, it was the mantra.
With graphs and regressions,
And countless expressions,
It made statistics feel like a tada!
This time I asked ChatGPT to write a limerick about Stata, and it worked! Note that the double quotes around the query are not optional.
Pass the response from Python to Stata
At some point, we may wish to use ChatGPT’s reply after we run our command. Specifically, we may wish to store ChatGPT’s reply to a local macro so that we don’t have to copy and paste it from the screen. Again, Stata’s SFI interface makes this an easy task.
Let’s modify our Python function first. Recall that the text of ChatGPT’s reply is stored in outputtext.choices[0].message.content. We can use the setLocal() method in SFI’s Macro package to store the reply to a Stata local macro named OutputText. I have again typed that line of code with a red font to make it easy to see in the code block below.
Next, we need to make two changes to the definition of our Stata command. First, we need to add the option rclass to our program definition to allow our command to return information after it terminates. Second, we need to add the line return local OutputText = `“`OutputText’”’ to return the contents of the local macro OutputText to the user. Note that I have used compound double quotes around the local macro because ChatGPT’s reply may contain double quotes. Again, I have typed those changes with a red font to make them easy to see in the code block below.
chatgpt.ado version 3
python clear

capture program drop chatgpt

program chatgpt, rclass

     version 18

     args InputText

     python: chatgpt()

     return local OutputText = `"`OutputText'"'

end


python:

import openai

from sfi import Macro

def chatgpt():

     openai.api_key = "PASTE YOUR API KEY HERE"

     inputtext = Macro.getLocal('InputText')

     outputtext = openai.ChatCompletion.create(

          model="gpt-3.5-turbo",

          messages=[{"role": "user", "content": inputtext}]

     )

     print(outputtext.choices[0].message.content)

     Macro.setLocal("OutputText", outputtext.choices[0].message.content)

end
Let’s run our ado-file to redefine our Stata command and Python function and then type a new chatgpt command.
. chatgpt "Write a haiku about Stata"
Data, Stata's realm,
Numbers dance, insights unfold,
Analysis blooms.
Now we can type return list and see that ChatGPT’s reply has been stored to the local macro r(OutputText).
. return list

macros:
         r(OutputText) : "Data, Stata's realm, Numbers dance, insights unfo..."
Write ChatGPT’s reply to a file
I like having access to ChatGPT’s reply in a local macro, but I noticed that some of the formatting, such as line breaks, has been lost. This would be easy to correct for a short reply, but it could be time consuming for a long reply. One solution to this problem would be to write ChatGPT’s reply to a file.
I’ve added three lines of code to the Python function in the code block below using a red font. The first line uses the open() method to create an output file named chatgpt_output.txt. The w tells open() to overwrite the file rather than to append new text. The second line uses the write() method to write ChatGPT’s reply to the file. And the third line uses the close() method to close the file.
chatgpt.ado version 4
python clear

capture program drop chatgpt

program chatgpt, rclass

     version 18

     args InputText

     python: chatgpt()

     return local OutputText = `"`OutputText'"'

end


python:

import openai

from sfi import Macro

def chatgpt():

     openai.api_key = "PASTE YOUR API KEY HERE"

     inputtext = Macro.getLocal('InputText')

     outputtext = openai.ChatCompletion.create(

          model="gpt-3.5-turbo",

          messages=[{"role": "user", "content": inputtext}]

     )

     print(outputtext.choices[0].message.content)

     Macro.setLocal("OutputText", outputtext.choices[0].message.content)


     f = open("chatgpt_output.txt", "w")

     f.write(outputtext.choices[0].message.content)

     f.close()

end
Again, we must run our ado-file to redefine our Stata command and Python function. Then we can type a new chatgpt command to submit a new query.
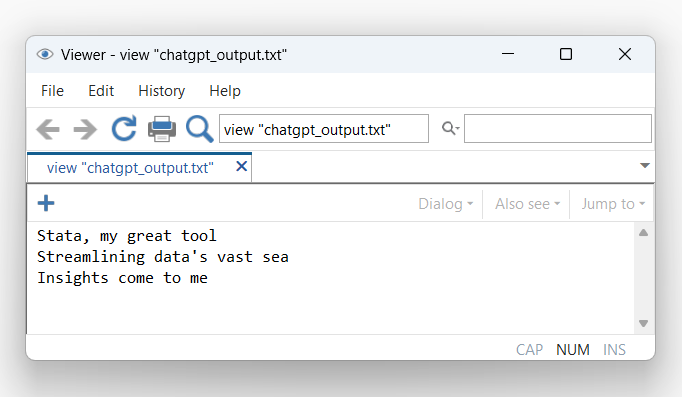
. chatgpt "Write a haiku about Stata"
Stata, my great tool
Streamlining data's vast sea
Insights come to me
Now we can view the output file to verify that it contains ChatGPT’s reply.
. view "chatgpt_output.txt"
We need to remove the line python clear from our .ado file once we finish modifying our program. This could cause problems with other Python code.
Conclusion
So that’s how I wrote the little chatgpt command that I posted on Twitter. It has very limited capabilities, but I wrote it only out of curiosity while I was eating lunch one day. I have tried some fun experiments such as asking ChatGPT to write Stata code to do simulated power calculations for different scenarios. The results are mixed at best, so I don’t need to dust off my CV yet. But the ChatGPT API can do far more than what I’ve demonstrated here, and you can learn more by reading the ChatGPT API Reference. And Python integration with Stata makes it relatively easy to create user-friendly Stata commands that utilize these powerful tools.